Posts tagged ‘tutorial’
Tasty treats with a kick
I am guest-blogging today over at Sew Can Do. Come on over and check it out!
Don’t they look tasty? These chocolates are easy to make yourself and the perfect gift for friends and family. Just keep them away from children – they have an extra special kick. ;) If you want to find out how I made the Marble Chocolates and Irish Treats, I suggest you head on over to Sew Can Do’s CraftShare.
Recycled t-shirt bracelet
It’s been forever since I managed to post something. Life has been incredibly busy, including a long weekend trip to Berlin, my camera has died on me and I’ve generally been rather un-crafty. However, here’s a quick little project for ya.

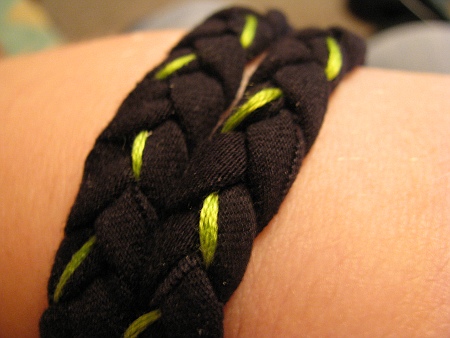
Make a recycled t-shirt bracelet!
A lot of times, t-shirt refashion tutorials will tell you to cut off the hem and throw it out. Well, we’re gonna use it today. You’ll also need embroidery thread and scissors. That’s it!
1. Take a t-shirt of your choice (mine was plain black, but any color you like will do) and cut off the hem. You’ll want to cut just under the stitching, so you have no stitching left when you’re done. Cut off the side seams so you get two long, narrow strips of shirt. Cut down the middle of the strips lengthwise. (This will be where the hem was folded.) You should now have four even narrower strips of shirt.
2. Take three strips of shirt. (Make something fun out of the fourth.) Pull gently on the ends until the strips start to curl in on themselves. You now have t-shirt yarn. Take out your embroidery thread and cut it the same length as your yarn. Make a knot into end of your yarn strips and embroidery thread.
3. Braid your bracelet. I laid my embroidery thread on top of one of my yarn strips to use as an accent. You could also wrap it around of the yarn strips. Whatever you do, take care to ensure that the thread will be visible and doesn’t disappear into the yarn. Continue to braid until you got the desired length. (I just braided it all and got a bracelet that fits around my wrist twice.)
4. Make another knot at this end to secure your braiding. To close your bracelet, carefully wiggle apart the braiding at one end until you’ve got a hole big enough to push your knot through. Secure with a few stitches or some glue if needed. The shirt should have enough stretch so you can slip the bracelet over your hand. Voilá, you’re done. Wear your recycled bracelet with pride.
I made my bracelet during a soccer game. It’s a great craft to do while watching your favorite tv show. I’ve been wearing my bracelet every day since. Since the t-shirt yarn is so soft and slightly stretchy, it’s really comfortable to wear.
DIY: wire sun pendant

It’s been quiet over here lately, but tonight the craft bug bit again. I got the idea for this pendant and just had to try it out immediately. There are still some kinks in it that I’d like to straighten out, but overall I’m quite happy with it.
This time I even managed to take some pictures along the line! To make your own wire sun pendant you’ll need:
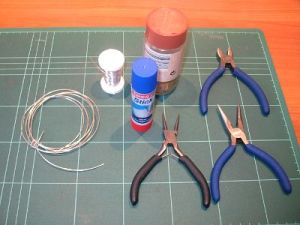
- gauge 18 and 22 silver-plated wire
- wire cutters and two pairs of pliers
- two round objects of varying size
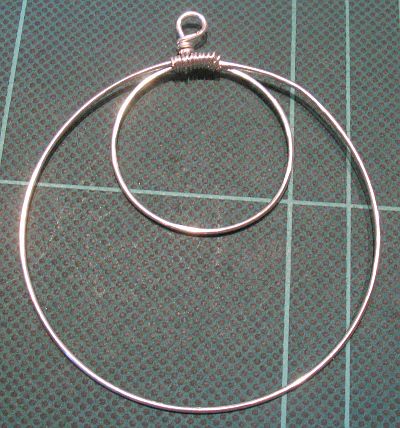
Start off by bending your 18 gauge wire around your bigger round object. I used a spice jar for that, but any lid or small glass would work. When you’ve completed the loop, get your smaller round object (I used a glue stick) and bend your wire around that.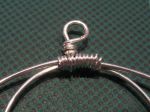 At last, make a loop on top and clip your wire. (You could also skip the loop and simply attach a jump ring later.) To secure the top, get some 22 gauge wire and wrap it firmly around the three strands of wire. You now have the basic shape of your pendant. (Try not to get any kinks into it like I did.)
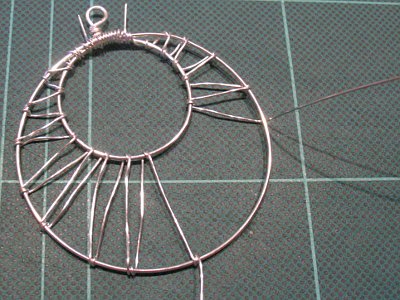
Next, get your 22 gauge wire and clip off a good length. (I just eyeballed it, you can always use more later.) Start by wrapping it a couple turns around at the top and then criss-cross between the inner and the outer loop, wrapping it one turn around the 18 gauge wire before changing directions. (Refer to the picture to see what I mean.)
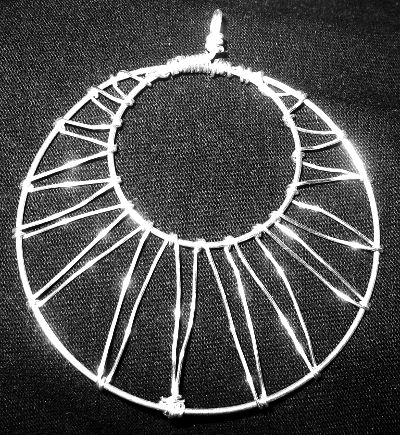
I managed to wrap half the pendant with my first length of wire. Then I clipped a second length and started at the other side of the top, working my way to the bottom, where I joined the two strands. Use your pliers to make sure the wire is wrapped securely. Make sure all the ends are tucked in so nothing will snag on your clothes or poke you. Straighten out as desired. And that’s it!
Shiny!
Giveaway winner & DIY small felt bucket
Our biggest German news site announced today that tomorrow the internet will have to be taken down for 24 hours to upgrade to IPv6. And then I remembered what day it was. Have you been fooled by someone today?
I promise this post will commence 100% April fool’s free. The deadline is up and we have a winner of my first blog giveaway.

Congrats, Renanda! Your easter surprise will hop its way to you.
Yesterday evening, my boy and I decided to visit the in-laws over the weekend. Which of course means my brain has been rattling with last-minute gift ideas. This morning, I set to work with some felt and embroidery thread I had lying around.
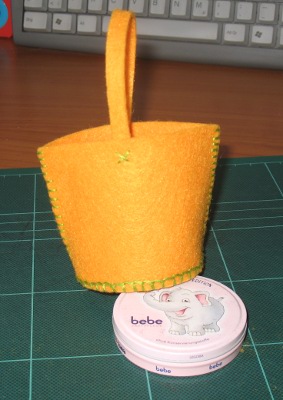
Please excuse the crappy picture, my camera batteries were dying on me. I’ve bought a new pack, which is currently happily trailing along in my boy’s backpack. D’oh.
I whipped up my own pattern for this cute little felt bucket. Here’s the basic steps if you wanna make your own:
You will need:
- colorful felt (mine was 2mm thick)
- contrasting embroidery thread and needle
- wash-out marker for the felt
- (metal) ruler
- x-acto knife and cutting mat or scissors
1. Find a lid or something round to trace onto your felt and cut out. I took a small jar with a 6 cm (2.5″) diameter. (It’s the one you can see in the photo propping up the bucket.)
2. Either calculate or measure the circumference with a piece of paper. I used paper to get a sense of how high I wanted my bucket to be. I ended up with a 20 cm (7.9″) long and 7 cm (2.7″) high strip.
3. Sew your base circle to the strip using a blanket stitch (here’s a good tutorial). Remember to sew the right sides together since you won’t be turning this later. I pinned the circle to the strip using some needles. It’s a bit fiddly, so you might want to glue it in place first.
4. Sew up one side using blanket stitch again. You now have a basic bucket shape. Mine bulged a little oddly where I sewed up the side, so I cut down the opposite side of the bucket and sewed it up again. This will give the bucket more of an oval and symmetric shape.
5. Freehand a strip for the bucket strap. Mine was about 0.8 cm (0.3″) high and 16 cm (6.3″) long. Sew it in place. (I thought the x-stitch looked really cute.)
Voilá, you have a handy-dandy felt bucket. It’d look super cute filled with easter grass and some colorful candy eggs. I plan to sew on some applications to spice up my bucket later, but I have to get thinner felt first.
DIY: Bunny Straws & 1st blog giveaway
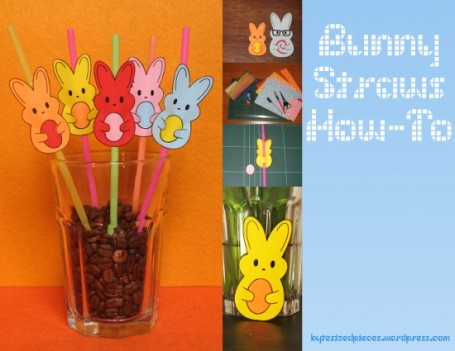
As promised yesterday, I’m back with the tutorial for the cute bunny straws. They’re the perfect addition for any easter table. You can use them as straws, glue them onto placecards or simply sprinkle them over the table. And the best thing about them? They’re quick and easy to make.
If you’d like to find out how you can get the chance to win a special easter surprise, I suggest you hop on down.
First off, gather your supplies. You will need:
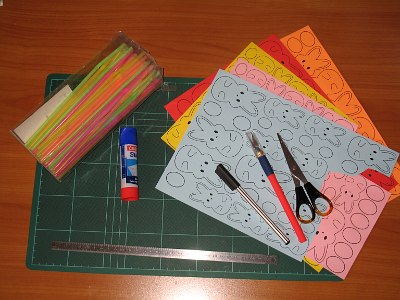
- sheets of colored paper
- scissors
- x-acto knife and cutting mat
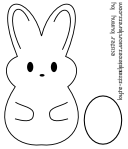
- the bunny template (A4 pdf) (US letter pdf)
- black marker
- glue stick (optional)
- straws (optional)
1. Print out the template onto your colored paper. The more colors, the more fun (and the more bunnies)! I’ve provided pdfs with 6 big and 12 small bunnies both for A4 and US letter sizes. If you want them a different size, simply grab the bunny on the right and print in desired size.
2. Grab your scissors and cut out all those bunnies and eggs. For a more finished look, draw around the cut edges with a black marker. Then lay out the bunnies and give each a differently colored egg.

3. We’re ready for the arms. Get your x-acto knife and grab a bunny. Place the egg above the bunny and mark the four places where you have to cut. (See the red darts.) I usually just poke the bunny with the tip of my x-acto knife.
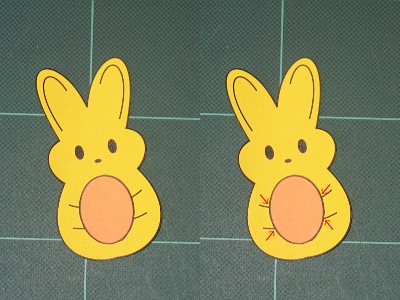
4. Cut along the arms from where you’ve marked your bunny.
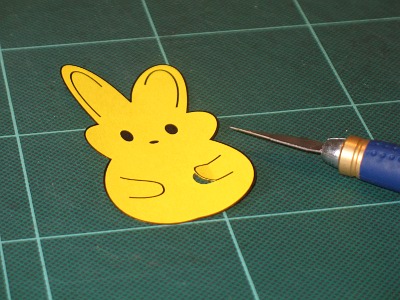
5. Now wiggle the egg under the arms and you’re done with the basic steps. This is what your bunny should look like now:
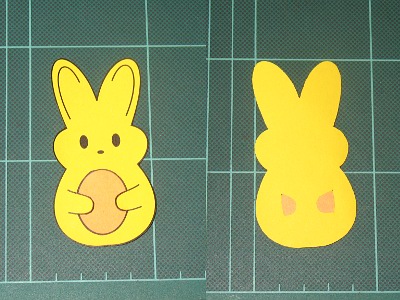
If you don’t want to use the bunny for the straws, you’re done now. Go let your bunnies hop around. You might want to glue down the egg with your glue stick. I found that mine hold their eggs quite well, so I skipped that step.
6. To pass the straw through the bunny, make two horizontal slits about 0.5 inches (1.3 cm) long as shown.
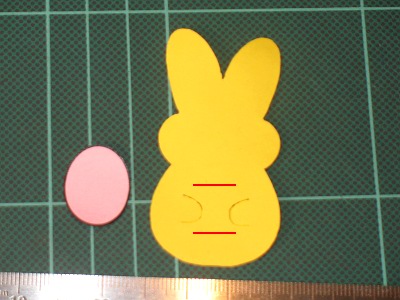
7.Now gently slide the straw through the two slits. You might want to press the bottom of the straw flat to make it pass through a little easier.
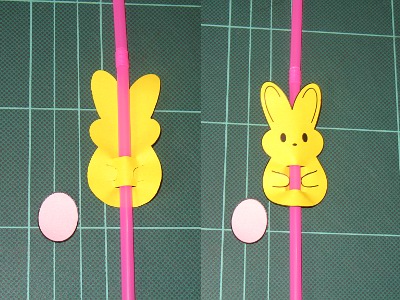
8. To hide the hole in the bunny, wiggle the egg under the arms in front of the straw. And you’re done!
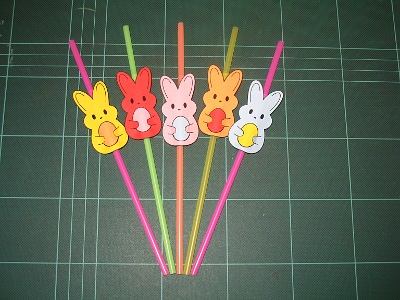
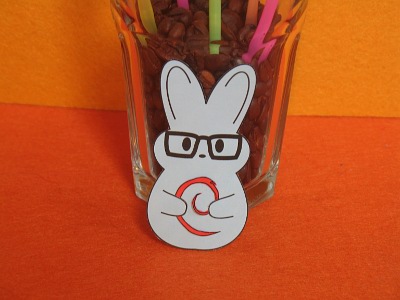
You can even have fun customizing the bunnies. I made my boy a special debian geek bunny:
Now on to the giveaway. I’ll be sending one reader a special easter surprise. Who doesn’t love surprises? To enter, all you have to do is tell me your favourite holiday in the comments to this post. Entries end March 31st, 23:59. The winner will be chosen randomly and announced on Thursday. Make sure you leave your e-mail so I can contact you.
The giveaway is now closed. Thanks everybody for participating!


