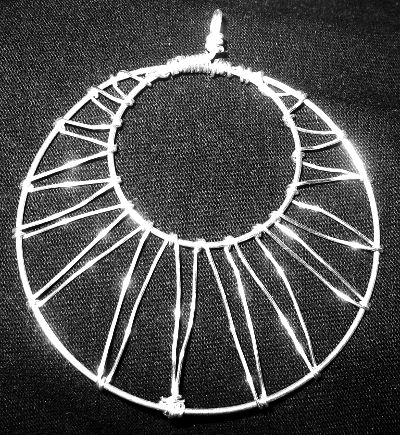
DIY: wire sun pendant
May 24, 2010 at 23:36 8 comments

It’s been quiet over here lately, but tonight the craft bug bit again. I got the idea for this pendant and just had to try it out immediately. There are still some kinks in it that I’d like to straighten out, but overall I’m quite happy with it.
This time I even managed to take some pictures along the line! To make your own wire sun pendant you’ll need:
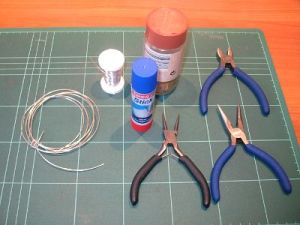
- gauge 18 and 22 silver-plated wire
- wire cutters and two pairs of pliers
- two round objects of varying size
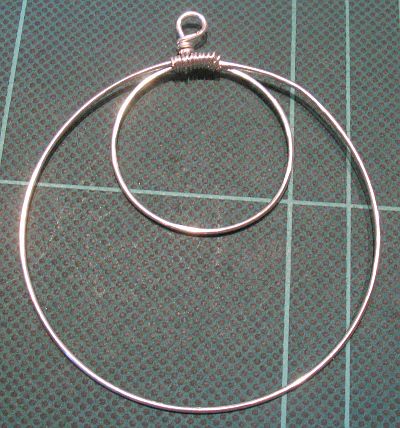
Start off by bending your 18 gauge wire around your bigger round object. I used a spice jar for that, but any lid or small glass would work. When you’ve completed the loop, get your smaller round object (I used a glue stick) and bend your wire around that.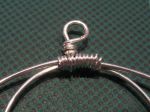 At last, make a loop on top and clip your wire. (You could also skip the loop and simply attach a jump ring later.) To secure the top, get some 22 gauge wire and wrap it firmly around the three strands of wire. You now have the basic shape of your pendant. (Try not to get any kinks into it like I did.)
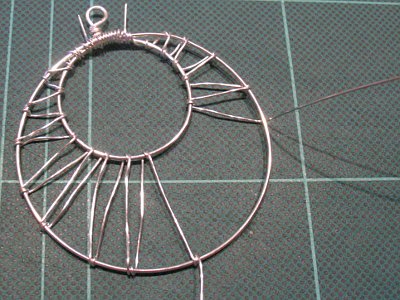
Next, get your 22 gauge wire and clip off a good length. (I just eyeballed it, you can always use more later.) Start by wrapping it a couple turns around at the top and then criss-cross between the inner and the outer loop, wrapping it one turn around the 18 gauge wire before changing directions. (Refer to the picture to see what I mean.)
I managed to wrap half the pendant with my first length of wire. Then I clipped a second length and started at the other side of the top, working my way to the bottom, where I joined the two strands. Use your pliers to make sure the wire is wrapped securely. Make sure all the ends are tucked in so nothing will snag on your clothes or poke you. Straighten out as desired. And that’s it!
Shiny!
Entry filed under: Jewelry, Tutorials. Tags: craft: jewelry, craft: wire, tutorial.
8 Comments Add your own
Leave a comment
Trackback this post | Subscribe to the comments via RSS Feed


1. Jenny | May 25, 2010 at 14:09
This is really beautiful. I would love these as earrings. Great work!
2. isabel | June 1, 2010 at 23:57
Thank you! The same technique would work great with earrings. I might try it if I find some smaller pieces to wrap around.
3. Kaysi @ Keeping It SImple | May 27, 2010 at 14:15
That is just stunning!! I love it!
4. isabel | June 1, 2010 at 23:57
Thank you, I’m glad to like it. :)
5. Cheryl | May 29, 2010 at 05:47
You make it look so do-able for someone new to jewelry making. Thanks for linking to Craftastic Monday:)
6. isabel | June 1, 2010 at 23:59
It really is! I promise there is no special trick involved. If you’re not afraid of poking yourself with some wire and have a few basic tools, then you’ve got all it takes to make this!
7. Pendientes de alambre con diseño de sol » El blog de LosAbalorios.com | May 24, 2012 at 00:01
[…] este es el pendiente terminado. Si quieres ver más imágenes de este trabajo, ingresa en el tutorial de bytesizedpieces o mira más ideas para hacer alambrismo en la categoría técnicas de nuestro […]
8. DIY Pendent With Wire | NewNise | May 13, 2015 at 04:50
[…] source […]