Wrapped teardrop pendant
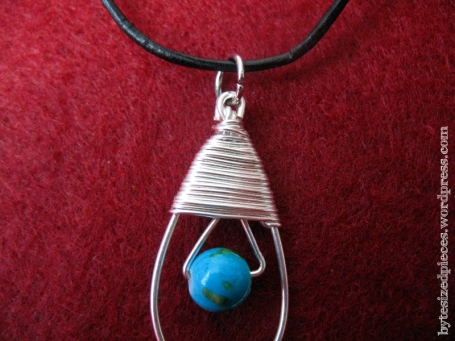
It’s been quiet over here, so I figured instead of trying to come up with tutorials and utterly failing, I’d just showcase some of the stuff I’ve been up to. I’ll try to give some pointers along the way as to how I did it. This is a pendant I made for a very dear friend of mine. She got it as a birthday present. I originally planned to make matching earrings as a christmas present, but sadly, she has since lost the necklace while on a holiday trip. At least I still have some pictures I can show you.
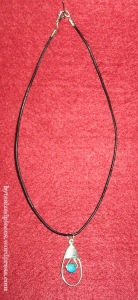
It was the first time I made a leather chain to go with it. The black leather makes a nice contrast to the bright silver and is comfortable to wear. I’m rather pleased at how it all turned out. I started with a teardrop shape (shaped over a glue stick, if I remember correctly), then added in the triangle with the bead, and wrapped it all with thin wire. The wrapping helps cover some spots, but you really have to pay attention to the top of the pendant. It’s not as forgiving as it looks. Start the wrapping at the top, making sure the end is secured and then go as far down as you want to. I kept the wire on the spool as I wrapped and only cut it once I got to the desired length. To finish, simply tuck the end in under the wrapping.
Some day, I will learn to take better photographs. Or get a better camera. That’ll help, right?
Dress up, me hearties, yo ho
Buckle up!
This has got to be one of the coolest t-shirts out there lately! Show your nerdiness with this ultimate qrrrrr-code. You can get the shirt from the awesome website threadless.com.
Summer in the City smoothie
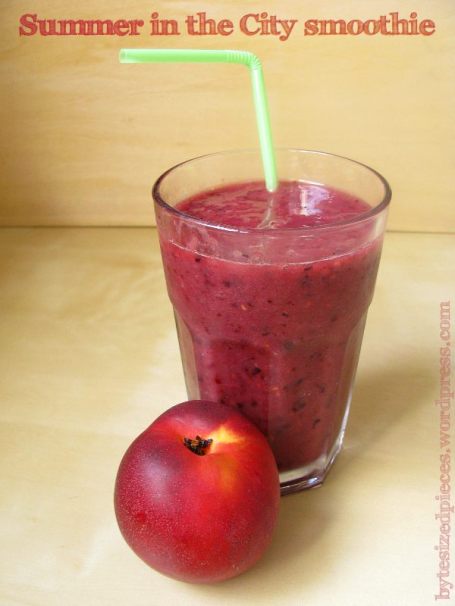
Today I went by the market and got some fresh fruit on my way home. We’ve had a really hot week here in Germany, with temperatures of 38° C (that’s 100° F). Today it started out a little cooler but with the sun out it soon heated up and I was craving a nice, light lunch. Something cool and refreshing and fruity. Cue the Summer in the City smoothie!
Summer in the City smoothie
(serves two)
- 2 ripe bananas
- 2 ripe peaches or nectarines
- 1 cup frozen wild berries (if you have fresh berries add a few ice cubes)
- 1 cup grape or orange juice
Peel the banana, break into pieces and throw it into your blender. Peel the peaches (the skin should come off easily if they’re ripe), cut up and throw in there as well. Add berries (and ice cubes, if you used fresh ones) and fill up with grape juice. Blend on high until everything is smooth. If it’s still too thick, add a little more juice. Enjoy!
It’s so delicious, I drank a whole big glass before I could restrain myself enough to snap a picture! Good thing I made enough for two servings. ;) I still have enough to make a second batch, but I’ll definitely pick up some more fruit to make this. The forecast says it’ll stay this hot for the rest of the week, so I’ll have lots of opportunities to enjoy my Summer in the City smoothie.
Tasty treats with a kick
I am guest-blogging today over at Sew Can Do. Come on over and check it out!
Don’t they look tasty? These chocolates are easy to make yourself and the perfect gift for friends and family. Just keep them away from children – they have an extra special kick. ;) If you want to find out how I made the Marble Chocolates and Irish Treats, I suggest you head on over to Sew Can Do’s CraftShare.
Recycled t-shirt bracelet
It’s been forever since I managed to post something. Life has been incredibly busy, including a long weekend trip to Berlin, my camera has died on me and I’ve generally been rather un-crafty. However, here’s a quick little project for ya.

Make a recycled t-shirt bracelet!
A lot of times, t-shirt refashion tutorials will tell you to cut off the hem and throw it out. Well, we’re gonna use it today. You’ll also need embroidery thread and scissors. That’s it!
1. Take a t-shirt of your choice (mine was plain black, but any color you like will do) and cut off the hem. You’ll want to cut just under the stitching, so you have no stitching left when you’re done. Cut off the side seams so you get two long, narrow strips of shirt. Cut down the middle of the strips lengthwise. (This will be where the hem was folded.) You should now have four even narrower strips of shirt.
2. Take three strips of shirt. (Make something fun out of the fourth.) Pull gently on the ends until the strips start to curl in on themselves. You now have t-shirt yarn. Take out your embroidery thread and cut it the same length as your yarn. Make a knot into end of your yarn strips and embroidery thread.
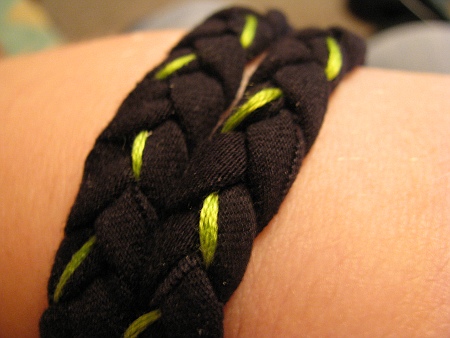
3. Braid your bracelet. I laid my embroidery thread on top of one of my yarn strips to use as an accent. You could also wrap it around of the yarn strips. Whatever you do, take care to ensure that the thread will be visible and doesn’t disappear into the yarn. Continue to braid until you got the desired length. (I just braided it all and got a bracelet that fits around my wrist twice.)
4. Make another knot at this end to secure your braiding. To close your bracelet, carefully wiggle apart the braiding at one end until you’ve got a hole big enough to push your knot through. Secure with a few stitches or some glue if needed. The shirt should have enough stretch so you can slip the bracelet over your hand. Voilá, you’re done. Wear your recycled bracelet with pride.
I made my bracelet during a soccer game. It’s a great craft to do while watching your favorite tv show. I’ve been wearing my bracelet every day since. Since the t-shirt yarn is so soft and slightly stretchy, it’s really comfortable to wear.
CraftShare 2010
CraftShare over at Sew Can Do has started!
CraftShare is a way for us craft lovers to share our crafting experiences, have posts that are more of a dialogue between blogger & readers and expand our crafting horizons together.
From laminated cotton to die cut crafts, CraftShare is about learning new crafts and sharing your ideas, projects and experience. I will be guest posting there later this month to share some of my favourite yummy chocolate recipes and I can’t wait to see all the other great projects and ideas. Hop on over and let’s get crafty!
DIY: wire sun pendant

It’s been quiet over here lately, but tonight the craft bug bit again. I got the idea for this pendant and just had to try it out immediately. There are still some kinks in it that I’d like to straighten out, but overall I’m quite happy with it.
This time I even managed to take some pictures along the line! To make your own wire sun pendant you’ll need:
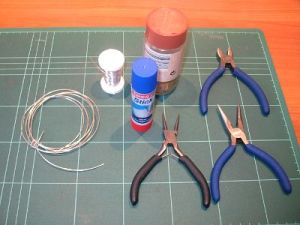
- gauge 18 and 22 silver-plated wire
- wire cutters and two pairs of pliers
- two round objects of varying size
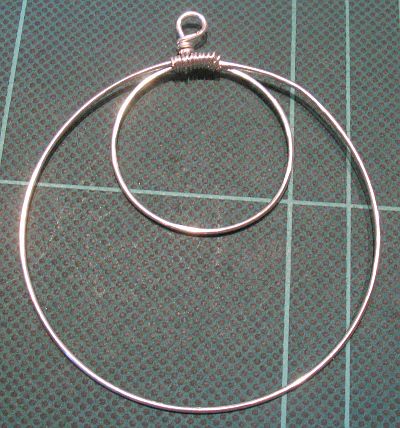
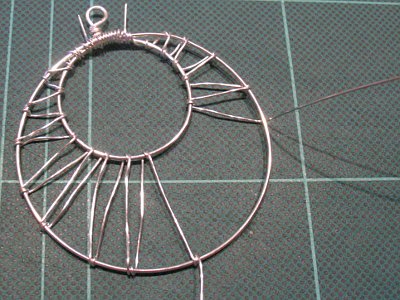
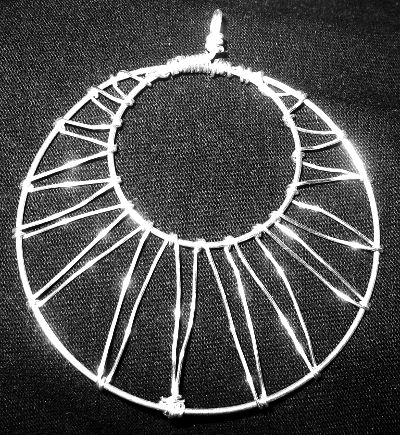
Start off by bending your 18 gauge wire around your bigger round object. I used a spice jar for that, but any lid or small glass would work. When you’ve completed the loop, get your smaller round object (I used a glue stick) and bend your wire around that.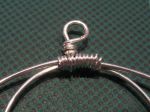 At last, make a loop on top and clip your wire. (You could also skip the loop and simply attach a jump ring later.) To secure the top, get some 22 gauge wire and wrap it firmly around the three strands of wire. You now have the basic shape of your pendant. (Try not to get any kinks into it like I did.)
Next, get your 22 gauge wire and clip off a good length. (I just eyeballed it, you can always use more later.) Start by wrapping it a couple turns around at the top and then criss-cross between the inner and the outer loop, wrapping it one turn around the 18 gauge wire before changing directions. (Refer to the picture to see what I mean.)
I managed to wrap half the pendant with my first length of wire. Then I clipped a second length and started at the other side of the top, working my way to the bottom, where I joined the two strands. Use your pliers to make sure the wire is wrapped securely. Make sure all the ends are tucked in so nothing will snag on your clothes or poke you. Straighten out as desired. And that’s it!
Shiny!
And you thought arcade games were dead
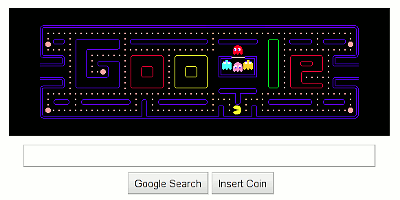
If you need a break from surfing the web, I suggest you head on over to Google for a fun little distraction. Google’s logo is a playable pac-man game! And if you’re feeling inspired, how about celebrating pac-man’s 30th birthday by making your own Pac-man paper lantern?
Sew, Mama, Sew! Giveaway Day
Today is Giveaway Day over at Sew, Mama, Sew! There are hundreds of blogs linked up for you to explore and some fun giveaways to enter. I spend the entire evening browsing blogs, adding my favorites to my Google reader and tossing my name in a few drawings. Go check out the fun! (And I shall go to bed now.)
DIY: wire heart necklace
Mother’s Day is fast approaching. Since there isn’t much time left until Sunday, I really had to get my stuff together. I wanted it to be something crafty, but it also had to be mailable – which ruled out lots of flowers art and elaborate baking creations. I’ve had this book on wire jewelry lying around for a few weeks now and decided to finally try my hand on it.
This is the first time I’ve ever worked with wire. It’s really rewarding and you only need very few supplies to get started, so it’s a great craft to try out. I already had a pair of wire cutter and straight-nosed pliers (though mine are rippled, which makes ugly dents in the wire so I’ll have to get a new pair), and a quick stop at the craft store left me with round-nose pliers and a bunch of different gauge wire. It cost me about five bucks.
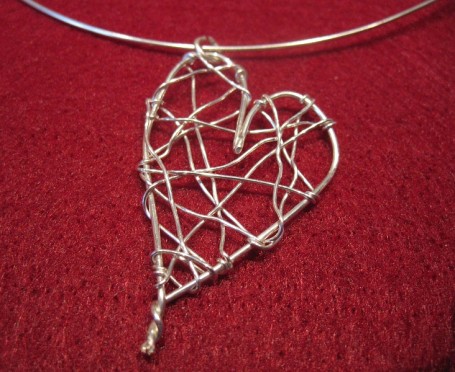
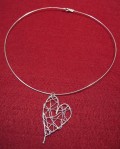 I used gauge 18 silver-plated wire to make the base of the heart. Clip off a long piece of wire, and make a sharp bend in the middle – this will be the top crease of your heart. Then bend each wire end over a sharpie or other big, round pen. I didn’t even try to make my halves the same to give the heart an asymmetric look. Bend the wires towards each other and twist together to make the bottom of the heart. Clip off any excess wire. I wrapped it with some 22 gauge wire, crisscrossing the heart and securing the points by wrapping the wire around my heart frame whenever I changed directions. Easy as that!
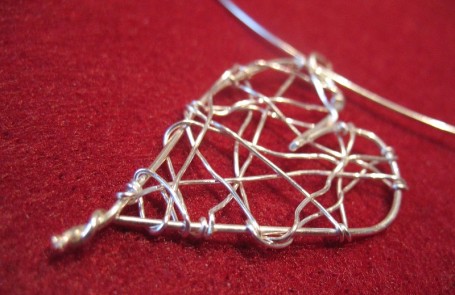
Attach a jump ring and thread onto a leather cord to make a pretty necklace. I whipped up a quick wire necklace by bending the 18 gauge wire into a big round shape and twisting together a quick hook and eye at the ends. This took me roughly an hour to put together. It’s my very first hand-made jewelry item and I think it’ll be a great gift for my Mom. Now I only have to get it in the mail!
What are you making for Mother’s Day?
P.S.: My mini windowsill garden is still waiting for some action. It’s day 6 and I’m trying to be patient, but I’ve really got a feeling my black thumb struck again. Nothing green to be seen yet. *sigh*
